


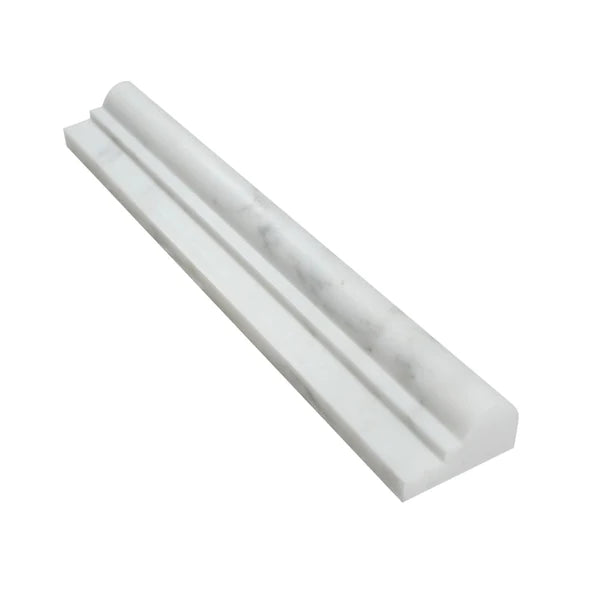
Asian Statuary Marble Ogee Molding
Subheading
Heading
Description
Elevate your tile work with Asian Statuary Marble Ogee Molding and enjoy a meticulous blend of beauty and craftsmanship. The carved white backdrop with beautiful marble gray streaks provides a molded white ogee trim which captures the sculpted refinement of modern civilization and ancient tradition effortlessly, perfect for any space.
Preferable for framing accent panels, creating walls, and a wide array of other transitions, this high grade marble molding serves a polished professional touch. The architectural line changes bring added depth with the ogee curve making this molding perfect for bathrooms, kitchens, fireplace surrounds, and almost any feature walls.
- Type: Ogee Molding
- Finish: Polished
- Material: Marble
-
Perfect For: Shower surrounds, trim edges, wall caps, and luxury framing
Subtle curves and polished detailing from the Asian Statuary Marble Ogee Molding provide a fitted transition and enhance tile work elegance unlike anything else.
Specifications
Installation
MATERIAL INSPECTION
- Inspect goods for defects before installation.
INSTALLATION
- Use white thin-set mortar.
- Grout joint minimum: 1/16”.
Elevate your tile work with Asian Statuary Marble Ogee Molding and enjoy a meticulous blend of beauty and craftsmanship. The carved white backdrop with beautiful marble gray streaks provides a molded white ogee trim which captures the sculpted refinement of modern civilization and ancient tradition effortlessly, perfect for any space.
Preferable for framing accent panels, creating walls, and a wide array of other transitions, this high grade marble molding serves a polished professional touch. The architectural line changes bring added depth with the ogee curve making this molding perfect for bathrooms, kitchens, fireplace surrounds, and almost any feature walls.
- Type: Ogee Molding
- Finish: Polished
- Material: Marble
-
Perfect For: Shower surrounds, trim edges, wall caps, and luxury framing
Subtle curves and polished detailing from the Asian Statuary Marble Ogee Molding provide a fitted transition and enhance tile work elegance unlike anything else.
MATERIAL INSPECTION
- Inspect goods for defects before installation.
INSTALLATION
- Use white thin-set mortar.
- Grout joint minimum: 1/16”.
FAQ
Use this text to share information about your product or shipping policies.
Is sealing the ogee molding required?
Yes, like all natural stone trim pieces, it should be sealed during and after installation to protect it from moisture and staining.