


Carrara White Marble Greek Key with Grey Corner Border
Subheading
Heading
Description
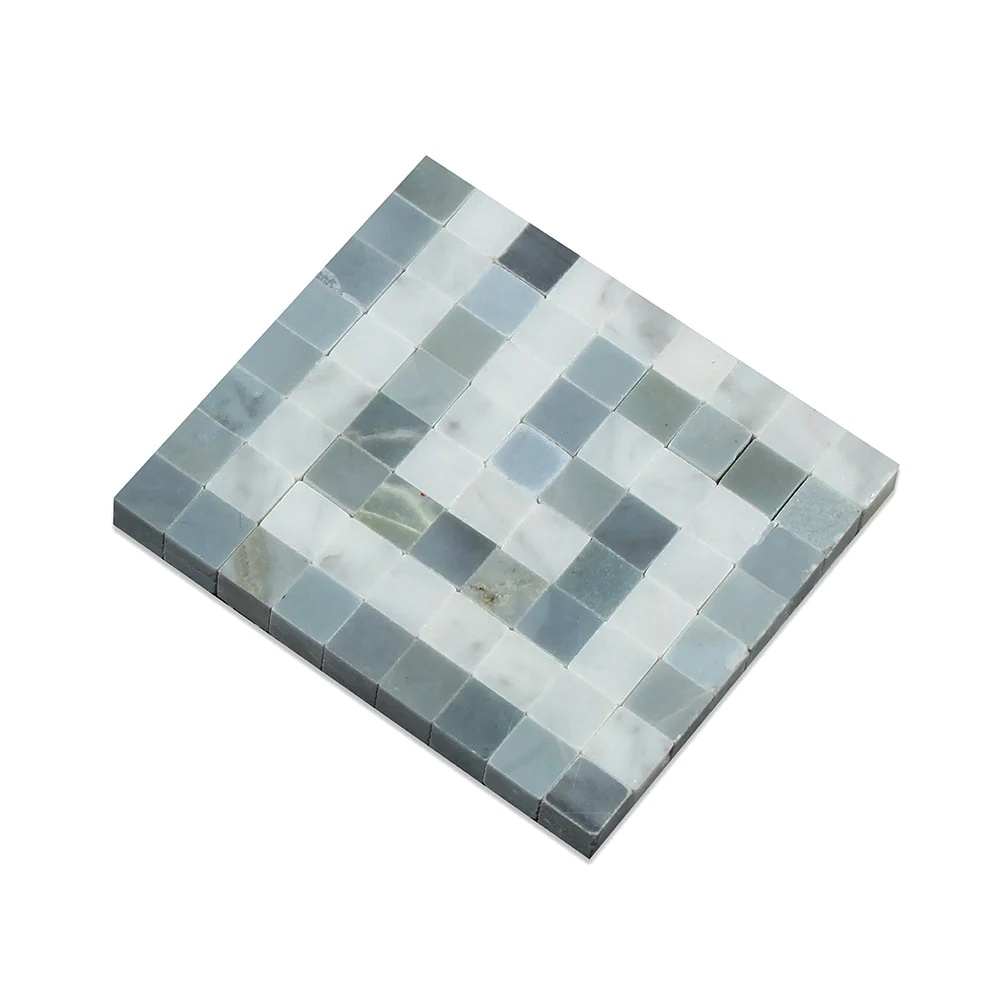
Achieve balanced proportions and design grace with Carrara White Marble Greek Key with Grey Corner Border Mosaic Tile. This mosaic showcases the Greek key motif along with the Carrara White marble’s natural beauty, which features a soft white base with subtle gray veining and polished grey marble accents that frame and define the geometric pattern.
The tile is strikingly polished and waterjet cut with precision which enhances the contrast and refinement of the tile. This makes it perfect for feature shower border tiles, vanity backsplash tiles, fireplace trim tiles, or any other architectural accent. The Greek key design is beloved for its symbols as well as everlasting elegance and as such is distinguished to be a centerpiece in both modern and classic spaces.
-
Pattern: Greek Key with Grey Marble Corners
-
Finish: Polished
-
Material: Carrara White Marble with Grey Marble Accents
-
Ideal For: Border accents, backsplash framing, fireplace surrounds, wall trims, shower niches, and inset detailing
This mosaic tile is a wonderful example of how simple elegance can be achieved through thoughtful marble detailing, and can be used to complement larger marble pieces or as an individual piece. Define your space with the structured elegance of this Carrara Greek Key mosaic—where timeless pattern meets marble refinement.
Specifications
Installation
MATERIAL INSPECTION
- Inspect goods for defects before installation.
INSTALLATION
- Use white thin-set mortar.
- Grout joint minimum: 1/16”.
Achieve balanced proportions and design grace with Carrara White Marble Greek Key with Grey Corner Border Mosaic Tile. This mosaic showcases the Greek key motif along with the Carrara White marble’s natural beauty, which features a soft white base with subtle gray veining and polished grey marble accents that frame and define the geometric pattern.
The tile is strikingly polished and waterjet cut with precision which enhances the contrast and refinement of the tile. This makes it perfect for feature shower border tiles, vanity backsplash tiles, fireplace trim tiles, or any other architectural accent. The Greek key design is beloved for its symbols as well as everlasting elegance and as such is distinguished to be a centerpiece in both modern and classic spaces.
-
Pattern: Greek Key with Grey Marble Corners
-
Finish: Polished
-
Material: Carrara White Marble with Grey Marble Accents
-
Ideal For: Border accents, backsplash framing, fireplace surrounds, wall trims, shower niches, and inset detailing
This mosaic tile is a wonderful example of how simple elegance can be achieved through thoughtful marble detailing, and can be used to complement larger marble pieces or as an individual piece. Define your space with the structured elegance of this Carrara Greek Key mosaic—where timeless pattern meets marble refinement.
MATERIAL INSPECTION
- Inspect goods for defects before installation.
INSTALLATION
- Use white thin-set mortar.
- Grout joint minimum: 1/16”.
FAQ
Use this text to share information about your product or shipping policies.
Can this tile be used on floors?
This mosaic is primarily designed for wall and vertical border applications. It could potentially be used on low-traffic floors or thresholds if properly sealed and installed.