

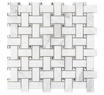


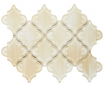
Crema Marfil Marble Basketweave with Emperador Polished Border
Subheading
Heading
Description
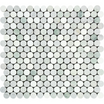
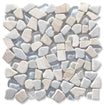
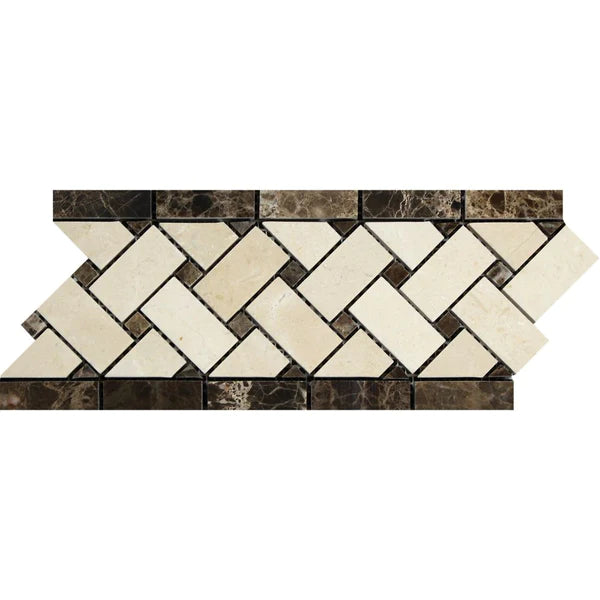
The Crema Marfil Basketweave Marble Inlay with Emperador Border is a sculptural tile masterpiece that marries classic design with the exquisite beauty of marble. Understated Crema Marfil marble which has been skillfully shaped into a woven pattern, bordered with Dark Emperador marble dots, guarantees this piece will match any polished decor.
This border is ideal for accentuating structure as a backsplash trim, shower border, wall alcove, or even wainscoting, giving life to blank spaces. The polished surface accentuates the chocolate brown, creamy beige of the stone, enhancing the veins and increasing the polish.
-
Finish: Polished
-
Material: Natural Crema Marfil Marble with Dark Emperador Dot and Border Accents
-
Ideal For: Backsplashes, bathroom walls, shower trims, fireplace inserts, feature panels, and vanity frames
Bring classical elegance and premium craftsmanship to your next project with this ready-to-frame basketweave marble border—engineered for beauty and balance. This contrast creates mesmerizing styles whether in residential bathrooms or in boutique-style commercial interiors. The trim serves to add warmth, geometry, and elegance to any tiled surface, regardless of the initial design placed around it.
Specifications
Installation
MATERIAL INSPECTION
- Inspect goods for defects before installation.
INSTALLATION
- Use white thin-set mortar.
- Grout joint minimum: 1/16”.
The Crema Marfil Basketweave Marble Inlay with Emperador Border is a sculptural tile masterpiece that marries classic design with the exquisite beauty of marble. Understated Crema Marfil marble which has been skillfully shaped into a woven pattern, bordered with Dark Emperador marble dots, guarantees this piece will match any polished decor.
This border is ideal for accentuating structure as a backsplash trim, shower border, wall alcove, or even wainscoting, giving life to blank spaces. The polished surface accentuates the chocolate brown, creamy beige of the stone, enhancing the veins and increasing the polish.
-
Finish: Polished
-
Material: Natural Crema Marfil Marble with Dark Emperador Dot and Border Accents
-
Ideal For: Backsplashes, bathroom walls, shower trims, fireplace inserts, feature panels, and vanity frames
Bring classical elegance and premium craftsmanship to your next project with this ready-to-frame basketweave marble border—engineered for beauty and balance. This contrast creates mesmerizing styles whether in residential bathrooms or in boutique-style commercial interiors. The trim serves to add warmth, geometry, and elegance to any tiled surface, regardless of the initial design placed around it.
MATERIAL INSPECTION
- Inspect goods for defects before installation.
INSTALLATION
- Use white thin-set mortar.
- Grout joint minimum: 1/16”.
FAQ
Use this text to share information about your product or shipping policies.
What is a basketweave marble border used for?
This bordered mosaic forms ready-to-install trims with enduring charm used for decorative borders, visual emphasis and for geometric interest in tiled walls, backsplashes, or shower installations.