


Emperador Dark Marble Greek Key Polished Border
Subheading
Heading
Description
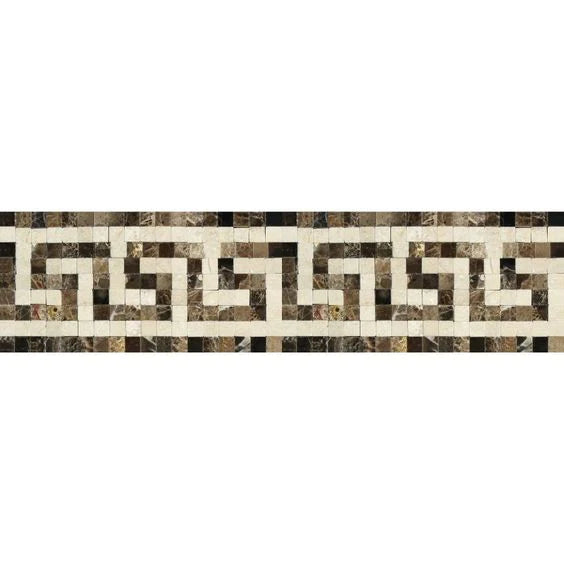
The Emperador Dark Marble Greek Key Polished Border was created using premium natural marble Emperador Dark and features the iconic Greek meander, one of the finest trademarks of timeless style and sophisticated decor. Its refined Emperador Dark base, decorated with vivid furniture white and beige veins, showcases expertly blended contrasting tones alongside unrivaled craftsmanship.
This elegant marble border is perfect for bathrooms, backsplashes, feature panels, and even fireplace surrounds. Its structured design allows the contemporary and traditional interiors to shine and stand out effortlessly. Completing this marvelous border is the polished edge which adds to the stone’s intricate geometric beauty by giving it a shine for everyone to appreciate.
-
Type: Decorative Border
-
Material: Natural Emperador Dark Marble
-
Pattern: Greek Key
-
Perfect For: Wainscoting, bathroom walls, wainscoting, backsplashes, and decorative inset panels.
- Finish: Polished
Make a statement with your tile designs and add timeless beauty by using this fit Emperador Dark Marble Greek Key Polished border. It will surely bring charm to any space needing a modern touch.
Specifications
Installation
MATERIAL INSPECTION
- Inspect goods for defects before installation.
INSTALLATION
- Use white thin-set mortar.
- Grout joint minimum: 1/16”.
The Emperador Dark Marble Greek Key Polished Border was created using premium natural marble Emperador Dark and features the iconic Greek meander, one of the finest trademarks of timeless style and sophisticated decor. Its refined Emperador Dark base, decorated with vivid furniture white and beige veins, showcases expertly blended contrasting tones alongside unrivaled craftsmanship.
This elegant marble border is perfect for bathrooms, backsplashes, feature panels, and even fireplace surrounds. Its structured design allows the contemporary and traditional interiors to shine and stand out effortlessly. Completing this marvelous border is the polished edge which adds to the stone’s intricate geometric beauty by giving it a shine for everyone to appreciate.
-
Type: Decorative Border
-
Material: Natural Emperador Dark Marble
-
Pattern: Greek Key
-
Perfect For: Wainscoting, bathroom walls, wainscoting, backsplashes, and decorative inset panels.
- Finish: Polished
Make a statement with your tile designs and add timeless beauty by using this fit Emperador Dark Marble Greek Key Polished border. It will surely bring charm to any space needing a modern touch.
MATERIAL INSPECTION
- Inspect goods for defects before installation.
INSTALLATION
- Use white thin-set mortar.
- Grout joint minimum: 1/16”.
FAQ
Use this text to share information about your product or shipping policies.
What makes the Greek key design special?
Its significance stems from the representation of unity and eternity, crafted by the ancients, rendering a glorious architectural detail to tile designs.