


30 Seconds Summary
- Resurfacing ceramic tiles costs 50–80% less than full tile replacement.
- Proper cleaning, sanding, and priming are critical for long-lasting results.
- Resurfacing usually takes 1–3 days, but full curing may require up to 7 days.
- Resurfacing works best for structurally sound tiles and is not suitable for severe damage or loose tiles.
Old tile floors can look worn, stained, or outdated, but you do not always need to remove and replace them entirely.
In this guide, you will learn how to resurface ceramic floor tile using simple tools and clear steps. We will also explain cleaning, sanding, priming, painting, sealing, drying time, and cost in detail. Furthermore, you will learn when resurfacing works best and when replacing tiles makes more sense.
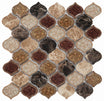
Are you looking for something bold and modern? Have a look atstatement-making hexagonal ceramic floor tilesfrom Mosaicenter.
Why Resurface Tiles Instead of Replacing Them?

Replacing tile is a big project. It means breaking the old tiles, removing glue, fixing the base, and then installing new tiles. This work is loud and dusty. It also takes time. In many homes, a full tile replacement can take several days or even weeks. You also need to pay for labor, new materials, and waste removal.
Resurfacing is much easier and faster. When you resurface ceramic tile floor surfaces, you keep the old tiles in place and apply a new coating on top. The job is usually finished in 1 to 3 days. There is no heavy demolition. There is no large mess. This makes it a good option for busy homes.
Here are the main reasons why many homeowners choose ceramic floor tile resurfacing instead of replacement:
- Big cost savings: Resurfacing can cost 50–80% less than full replacement. This means you can save thousands of dollars in labor and materials.
- Less mess and noise: There is no need to break tiles or remove them. This means no loud demolition and much less dust.
- Fast turnaround: Most resurfacing jobs are completed in one to three days, depending on the size of the space.
- Easy style update: You can change the color or finish of old tiles without trying to find matching or discontinued designs.
- Eco-friendly choice: Keeping your existing tiles reduces landfill waste. This makes resurfacing a more sustainable option.
- Stronger surface: Professional refinishing adds a new, durable, and stain-resistant coating over the old tile.
Resurfacing works best when the tiles are still strong but look worn or outdated. In that case, it is a smart, simple, and budget-friendly way to improve your space.
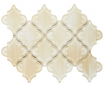
Want a high-end finish without a full remodel? Check out elegant marble tiledesigns at Mosaicenter.
Can Ceramic Tile Be Refinished?
Many homeowners ask, " Can ceramic tile be refinished? The answer is yes. Ceramic tile can be refinished, also called reglazed, to change its color, hide old patterns, and repair small chips. The new coating creates a smooth, high-gloss, and waterproof surface. It is a cost-effective option compared to a full remodel.
The refinishing process usually includes:
- Deep cleaning to remove dirt, soap, and grease
- Repairing small chips or cracks
- Spraying a strong polyurethane or epoxy coating over the tile
- Allowing proper drying and curing time
This method covers the old surface and gives it a fresh look. It does not remove the tile. It simply adds a new finish on top.
Many people also ask," Can you refinish ceramic tile in all areas of the home?” Refinishing works best in:
- Bathroom walls
- Shower surrounds
- Bathtub areas
- Kitchen countertops
- Bathroom floors with light to medium traffic
However, there is caution for some areas. High-traffic entryways or floors with heavy dirt and grit are not ideal for refinishing. In these spaces, the surface may wear down faster.
Another common question is, can ceramic tile be refinished more than once? In some cases, yes. But the old coating must still be strong and not peeling. If peeling has started, it must be removed before applying a new layer.
It is also important to understand the limits:
- Severely cracked or broken tiles should be replaced.
- Refinishing does not make tiles stronger. It only covers the surface.
- Water damage behind the tile must be repaired first.
Tools and Materials You Will Need to Resurface Ceramic Tiles
Before resurfacing ceramic tile floors, you must have all the tools and materials. So you can work smoothly without stopping in the middle of the project. Resurfacing is only successful when the surface is clean, rough, and properly coated.
Below is a detailed list of what you will need for a DIY project.
Cleaning and Preparation (Most Important Step)

If the tile is not cleaned and sanded well, the new coating can peel or bubble. Preparation is the foundation of strong ceramic tiles resurfacing.
You will need:
- Heavy-duty tile cleaner or degreaser to remove wax, soap, grease, and dirt
- Fine-grit sandpaper (120–220 grit) or sanding block to remove shine and help primer stick
- Sponge, mop, and bucket for washing and rinsing
- A scraper or a razor blade to remove old caulk and stuck debris
- Vacuum cleaner to remove sanding dust
- Tack cloth to wipe away fine dust after sanding
Cleaning and sanding may feel slow, but this step prevents future problems.
Application Tools

Using the right tools gives you a smooth and even finish. Cheap tools can leave marks or lint on the surface.
You will need:
- Foam paint roller (4-inch recommended) for smooth, even coating
- Paint tray with liners to hold primer and paint
- Foam brush or small brush for corners and grout lines
- High-quality painter’s tape (green type) to protect baseboards and cabinets
- Drop cloths or plastic sheets to cover nearby areas
With these tools, you will be able to apply the coating neatly and avoid a mess.
Resurfacing Materials

The coating itself is the most important material in ceramic floor tile resurfacing. Always choose products made for floors.
You will need:
- Tile refinishing or reglazing kit, often with two-part epoxy or special floor coating
- Bonding primer, usually included in the kit
- Two-part epoxy filler (optional) to repair small chips or cracks
- Stencil and stencil brush (optional), if you want to add a design pattern
Do not use regular wall paint. Floor coatings are stronger and more resistant to water and foot traffic.
Safety Gear (Do Not Skip This)

Resurfacing products can have strong fumes, which is why it is important to have safety gear.
You should use:
- P100 respirator mask to protect from strong odors and chemicals
- Waterproof gloves to protect your hands
- Safety goggles to protect your eyes
- Knee pads for comfort during long working hours
Good ventilation is also necessary. Open windows and use fans while working.
How to Resurface Ceramic Tiles?
Here is a step-by-step guide on how to resurface ceramic tile floors without replacing them:
Step 1: Preparation and Deep Cleaning
Every strong resurfacing ceramic tile project begins with careful cleaning. If dirt, grease, or soap stays on the surface, the new coating will not stick well. Many coating failures happen because this step was rushed.
Start by sweeping or vacuuming the entire floor. Remove loose dust and small debris. Next, scrub the tiles and grout lines with a heavy-duty cleaner or abrasive tile cleaner. Focus on corners and grout because grease and dirt collect there.
After scrubbing, rinse the floor with clean water. Make sure no cleaner residue remains. Let the surface dry fully before moving to the next step. A clean, dry floor is the foundation for properly resurfacing ceramic tiles.
Step 2: Repair and Sanding
Now inspect the tiles carefully. Look for small chips, cracks, or damaged grout. Use a tile repair compound or epoxy filler to fix these areas. Apply the filler smoothly and allow it to dry completely.
Once repairs are dry, lightly sand the entire surface using fine-grit sandpaper. Sanding removes the glossy finish and helps the primer bond strongly. You are not removing the tile. You are only roughening the surface slightly.
After sanding:
- Vacuum all dust carefully.
- Wipe the floor with a damp cloth.
- Make sure the surface feels smooth but not shiny.
Step 3: Apply a High-Adhesion Primer
Primer works as a bonding layer between the old tile and the new coating. Without primer, peeling can happen in a short time.
Choose a primer made for ceramic surfaces. Apply it evenly with a roller for the main area. Use a brush for corners and grout lines. Do not apply it too thickly. A thin and even layer works best.
Let the primer dry according to the manufacturer’s instructions. This usually takes several hours. Proper drying will make sure the next layer will stick well when you continue refinishing the ceramic tile.
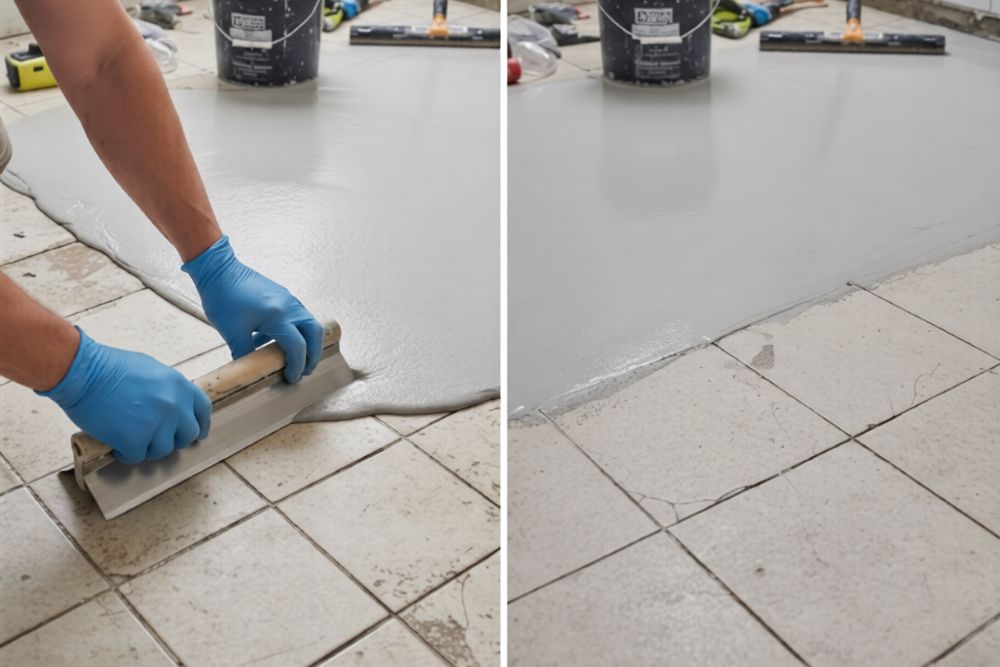
Step 4: Applying the Coating
Now the surface is ready for the final finish. This is where you truly resurface ceramic tiles and change their look.
You have two main coating options:
- Specialized Tile Paint:
Use a roller for large areas and a brush for grout lines. Apply thin and even coats. Two coats are usually better than one thick coat.
- Two-Part Epoxy Coating:
This option gives a stronger and more durable finish. It is ideal for high-traffic areas. Mix the two parts carefully and apply evenly across the surface.
Step 5: Curing and Drying
After applying the coating, allow it to dry completely. Drying time depends on the product used. Some coatings feel dry in one day but need several days to fully cure.
Avoid walking on the floor for at least 48 hours. Keep water away from the surface during this time. Full curing makes the surface stronger and more durable.
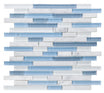
Upgrade your home with premium Ceramic Tiles from Mosaicenter.
Drying and Curing: What You Must Know
After resurfacing ceramic tile, drying and curing are very important. Drying means the surface feels dry to the touch. Curing means the coating fully hardens and bonds to the tile.
Here is a simple timeline:
- Touch dry: 1–3 hours
- Light use: 24–48 hours
- Full cure: 3–7 days
Even if the floor feels dry, it is not fully cured. Do not use water, soap, or cleaning products during this time. Avoid placing heavy or sharp objects on the surface for at least one week.
Temperature, humidity, and airflow affect curing. The best temperature is around 68°F to 75°F. High humidity slows the process. If curing is rushed, peeling, soft spots, or discoloration may appear.
Ceramic Tile Refinishing Cost
The average ceramic tile refinishing cost ranges from $4 to $12 per square foot. Most homeowners spend between $789 and $1,556 for a full project.
DIY kits cost $50 to $200, but they are less durable than professional systems. Professional refinishing can last 10 to 15 years with proper care. Compared to replacement, refinishing is about 70–80% cheaper, making it a smart budget option.
When Resurfacing Is Not the Right Choice?
Resurfacing improves appearance, but it does not fix structural problems. Replacement is better if:
- Tiles are cracked deeply or broken
- Tiles are loose or moving
- There is water damage or mold under the tile
- Grout is crumbling badly
Resurfacing also may not work well in heavy entryways with constant foot traffic. It is best for tiles that are stable but outdated or slightly worn.
If your tiles are too damaged to refinish, check out Floor Tile options at Mosaicenter.
FAQs
Q: Can you resurface ceramic tiles?
A: Yes, ceramic tiles can be resurfaced if they are in good condition and the process is done correctly. Proper cleaning, repair, and coating are necessary for a strong and lasting finish.
Q: How long does resurfaced ceramic tile last?
A: Professionally resurfaced ceramic tiles can last 10 to 15 years with proper care. DIY resurfacing typically lasts 5 to 10 years, depending on traffic and maintenance.
Q: Is resurfacing ceramic tile floors safe?
A: Yes, it is safe when proper ventilation is used, and low-VOC products are selected. Wearing safety gear during application is also strongly recommended.
Q: Can you change the color of ceramic tiles by resurfacing?
A: Yes, resurfacing allows you to completely change the tile color and finish. You can choose a matte, satin, or glossy finish based on your design preference.
Over to You
Resurfacing ceramic floor tiles is a smart and budget-friendly way to update your space without the mess and cost of full replacement. When tiles are still strong but look outdated or worn, refinishing can give them a clean, modern appearance in just a few days.
Visit Mosaicenter today and transform your space with high-quality, stylish tile designs.

Halil I Oguz
At Mosaicenter's, Halil I Oguz brings a unique blend of strategic insight and creative flair to our digital experience. As our dedicated Founder & Tile Expert, he masterfully curates the online journey, allowing the inherent quality and design artistry of our premium tiles to truly shine.
From showcasing the intricate patterns of our mosaics to detailing the robust, scratch-resistant and water-resistant finishes of our porcelain and natural stone, Halil crafts content that is both informative and deeply engaging.
His work empowers Mosaicenter's clients to confidently select from our extensive range, helping them transform spaces with tiles that reflect both enduring style and practical excellence.

Leave a comment
This site is protected by hCaptcha and the hCaptcha Privacy Policy and Terms of Service apply.